Create a Block in AutoCAD
What is an AutoCAD block? A block is simply a collection of objects (it could be one object) that has a name. Blocks have several advantages:
- You can insert them again and again, saving time. In fact, you can insert them into other drawings as well.
- A block uses less electronic space than individual objects, so your drawing file is smaller.
- By updating a block’s definition, you can update all the blocks in the drawing.
Note: Dynamic blocks are blocks that have added parameters that function in certain defined ways. Look at the end of this post for links to some posts on dynamic blocks.
How do you create a block?To create a block, follow these steps:
1. Draw the objects that you want in the block.
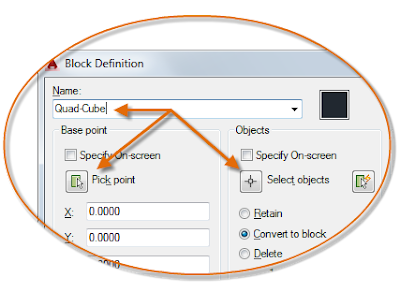
2. Choose Home tab, Block panel, Create to start the BLOCK command. The Block Definition dialog box opens.
3. Type a name in the Name text box. The name can have spaces.
4. You need to specify a base point. That’s the point at which you’ll insert the block. In the Base Point section, click Pick Point. Be sure to use an object snap for accuracy! You’ll immediately be returned to the dialog box.
5. In the Objects section, click the Select Objects button. Select the objects and press Enter to return to the dialog box. Tip: You can select the objects before using the command and they’ll show up in the dialog box.
6. Just below, choose Retain, Convert to Block, or Delete. These options control what happens after you create the block.
7. In the Behavior section, you can make a block Annotative (more info here), force it to scale uniformly and choose whether to allow exploding.
8. In the Settings area, choose the block unit. You can choose Unitless but if you choose a unit, AutoCAD will try to scale the block appropriately when you insert it into another drawing. You can also add a hyperlink if you want.
9. Finally, you can add a description in the Description box. A description is helpful in the Design Center, when you want to insert the block from another drawing.
10. Click OK to complete the box. If you chose Delete, the objects disappear. You can use the OOPS command to bring them back.


Thank you for sharing this tip. Nowadays,CAD drawing services are major help in industries.
ReplyDelete