Posts

Showing posts from August, 2013

Revit Timeline

Before Public release – Charles River Software 0.1 1999 11 (Early Adopter 1) 0.2 2000 01 (Early Adopter 2) Product released to Public – Revit Technology Corporation 1.0 2000 04 2.0 2000 08 2.1 2000 10 3.0 2001 02 3.1 2001 06 4.0 2001 11 4.1 2002 01 Autodesk Revit 2002 04 04 (Autodesk buys Revit Technology Corp) 4.5 2002 05 09 5.0 2002 12 17 2003 04 28 (Zoogdesign Revit Forum goes Live) 5.1 2003 05 5.5 2003 04 01 (pseudo mac release screenshot, April Fool's joke...Author unknown) 6.0 2003 12 22 6.1 2004 03 11 2004 05 26 (Zoogdesign Read Only to Merge with AUGI) 7.0 2004 12 13 Autodesk Revit Building (New Name) 8.0 2005 02 26ish 8.1 2005 08 12 (web release then withdrawn) 8.1 2005 08 23 (Actual release) 9.0 2006 04 12 (Shipping & Web Release) Autodesk Revit Series (Marketing Bundle w/ AutoCAD) 1.0 2003 12 01 (Revit 6.1) 2.0 2004 XX XX (Revit 6.1) 8.0 2005 XX XX (Revit 8.0) 8.1 2005 XX XX (Revit 8.1, AutoCAD 2006) Autodesk AutoCAD Revit Series 9 – Building (Marketing Bundle w/ Aut
Keeping Your AutoCAD Files Intact By Mark Middlebrook

Although it can take many hours or days (or weeks) to accomplish a large chunk productive work in AutoCAD, you can accidentally undo it all (and that of your colleagues!) in minutes. Follow these guidelines to avoid doing harm to the hard work of others and the productive potential of yourself. Be precise Using precision techniques such as snap, object snaps, and typed coordinates is a fundamental part of good CAD practice. Don't try to use AutoCAD like an illustration program, in which you eyeball locations and distances. Use one of the many AutoCAD precision techniques every time you specify a point or distance. Control properties by layer AutoCAD gives you two different ways of controlling object properties such as color, linetype, and lineweight: by layer and by object. Unless you have a really good reason to assign properties by object — such as instructions from your company's CAD manager or the client for whom you're creating the drawing — use the by-layer

A Very Quick Tip- Aligned with Dimension Line

Image
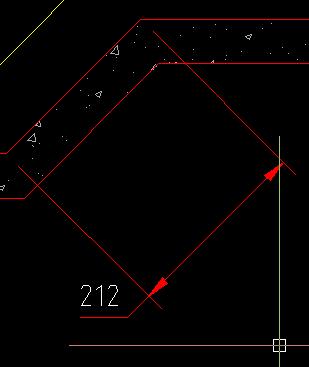
Problem: Using “dimalign” command but text is not align with the dimension line when you stretch to left or right. See the image below. But you wanted to align the text with the dimension line. See the image below. Solution: Type” D” (without the quotes) for Dimension Style Manager, clicks Modify and chooses the Text tab. In-text alignment, choose Aligned with dimension line. That’s it. See image below. Does it make sense? Anyone can share your ever secret tips. Be a guest blogger for AutoCAD.

CAD Tip Of The Day: How to isolate objects and hide it.

Image
How to isolate objects and hide it. 1. Type the " isolateobjects " in the command line (without the quotes). Select the objects you want to isolate.  2. Another options select first the object you want to isolate. Right-click in the drawing area and select Isolate Objects. Only the selected objects are displayed. All other objects are hidden. 3. To redisplay hidden objects, right-click in the drawing area and select Isolate End Object Isolation. Its same process with hide object 4. Select the objects you want to hide.  5. Right-click in the drawing area and select Isolate Hide Objects.  6. The selected objects are hidden. (It’s like the command action of layoff) 7. To redisplay hidden objects, right-click in the drawing area and select Isolate End Object Isolation.  Try to save, close, and reopen your drawing, the object is still there the time you isolate or hide.  TIP: Before hiding or isolating objects, set OBJECTISOLATIONMODE to 1.